![]() Adding Charges via Appointment
Calendar
Adding Charges via Appointment
Calendar
Adding charges/visits to your Charge Entry screen via the appointment calendar will ensure that charges are linked to open appointments. Creating this relationship between a patient charge and a patient appointment will ensure that patient's names are not erroneously added onto the Missed/Canceled appointments report.
Whenever a charge has been linked to an open appointment, the patient's names will appear in italics on the appointment grid.
To access the Charge Entry screen from the appointment calendar, follow procedure below.
1. Open the Appointment Calendar.
2. From the appointment grid, locate and double-click the appointment you wish to link charges to.
3. OR from the top of calendar screen, select a patient's name from the drop down and then highlight the appointment you wish to link charges to. Click the Edit-Reschedule-Cancel button.
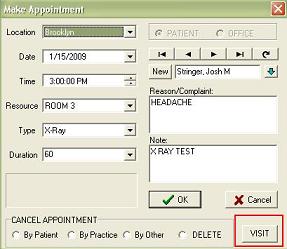
4. The Make Appointment screen will appear.
5. Instead of editing, canceling or deleting the appointment, click on the Visit button to the far right of the Make Appointment box.
6. You will be re-directed to the patient's Charge Entry screen. Make sure the visit date marches the date of the appointment you selected inside the calendar and then post a charge as you normally would. To learn more about posting charges, click here.
7. After you leave the Charge Entry screen, you will automatically exit back to the Appointment Calendar. Click the Refresh button at the bottom of the calendar screen.
8. The patient's name will be italicized on the scheduled appointment and will not appear on any generated Missed/Canceled appointments reports.

Note: Even when you post charges independently of the appointment calendar, visit dates will still link to appointment dates for the same patient. Using the procedure above is only an easy way to ensure that this takes place.